Inflatable water toys make for great summer fun. To save space and for easy transport, many boaters keep these deflated until they’re ready to start the fun. The question is: What’s the best way to inflate everything once you’re on the water and ready to get the party started?
The new award-winning Atmos Air Station from Scanstrut represents one of the most convenient. It’s easy to use and ignition-protected. It flush-mounts permanently on a flat surface in your boat, with enough surface area and depth to accommodate the compact unit.
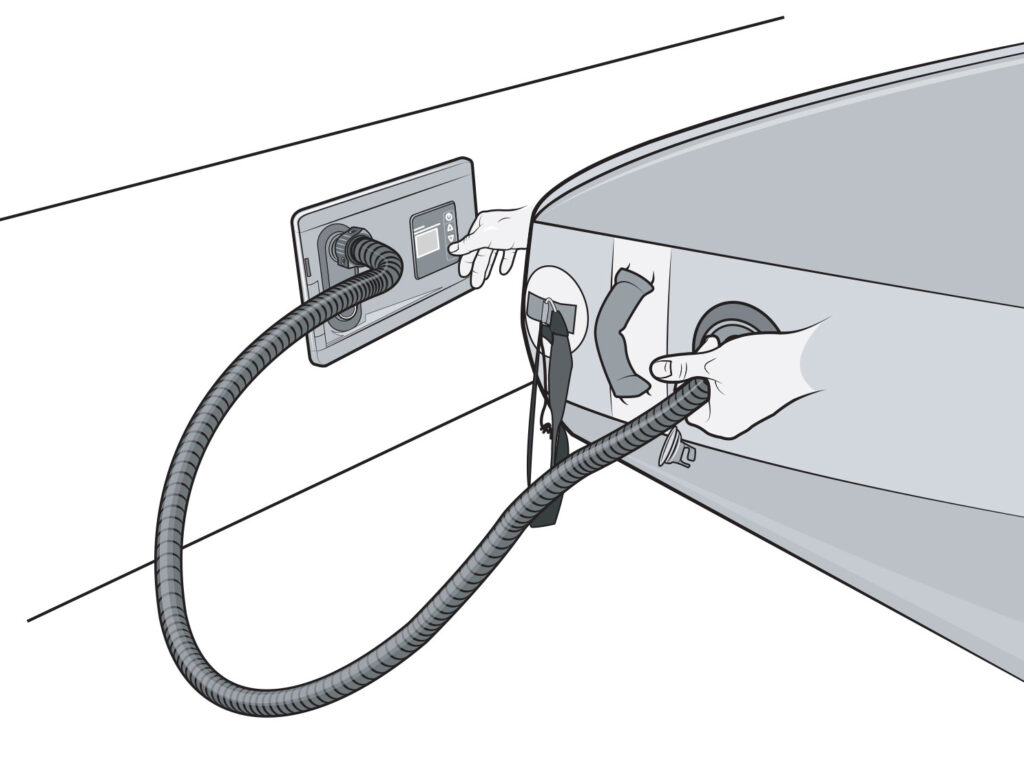
Unlike portable inflators that need to be hooked up to a battery with alligator clips, the Atmos two-stage (high- and low-pressure) pump is always connected to power and ready to pump up any inflatable item you have on board. Atmos also lets you set the target air pressure that you want to achieve. It will automatically shut off when it reaches the preset PSI. What’s more, the brushless 12-volt DC air-pump motor can also deflate your toys (using the unit’s “Deflate” port) at the end of the day, so you can more easily stow them for the ride home.
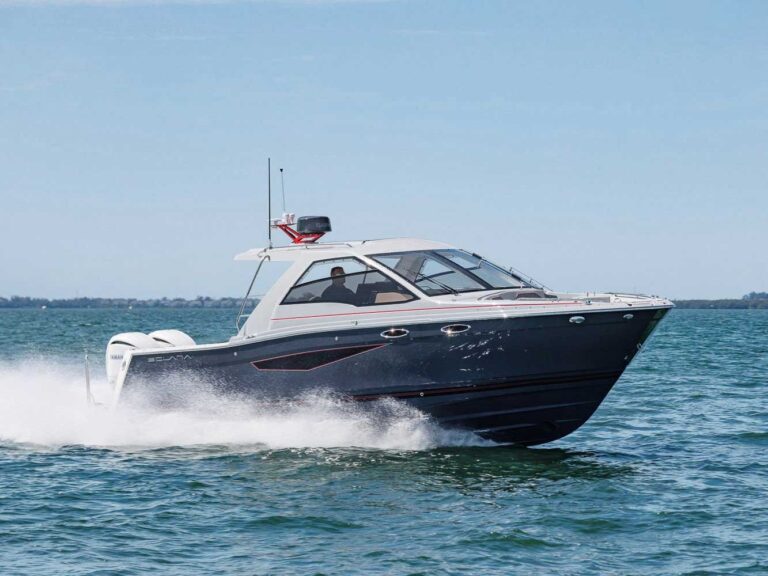
The Atmos features an LCD display and comes with a detachable 8-foot air hose (or optional 12-foot hose) and six types of connectors to fit a wide range of inflation valves on watertoys, floats and kayaks, as well as inflatable boats, stand-up paddleboards and foiling boards. Here’s how our project went on a 24-foot sterndrive runabout.
Skill Level: 2 of 5
Finish Time: Approx. 3 hours
Tools and Supplies
- Scanstrut Atmos Integrated Air Station ($344.99; defender.com)
- Masking tape
- Marking pencil
- Pozi screwdriver
- Power drill and drill-bit set
- Countersink bit
- 1 ¾-inch hole saw
- Thin-kerf hand or power saw
- Tape measure
- Soldering gun and materials
- Marine wire crimp connectors
- Heat-shrink tubing and heat gun
- Marine silicone sealant (optional)
- Ten 20 mm M3 countersunk machine screws, washers and nylon lock nuts (for installion on metal surfaces)
Select a Location
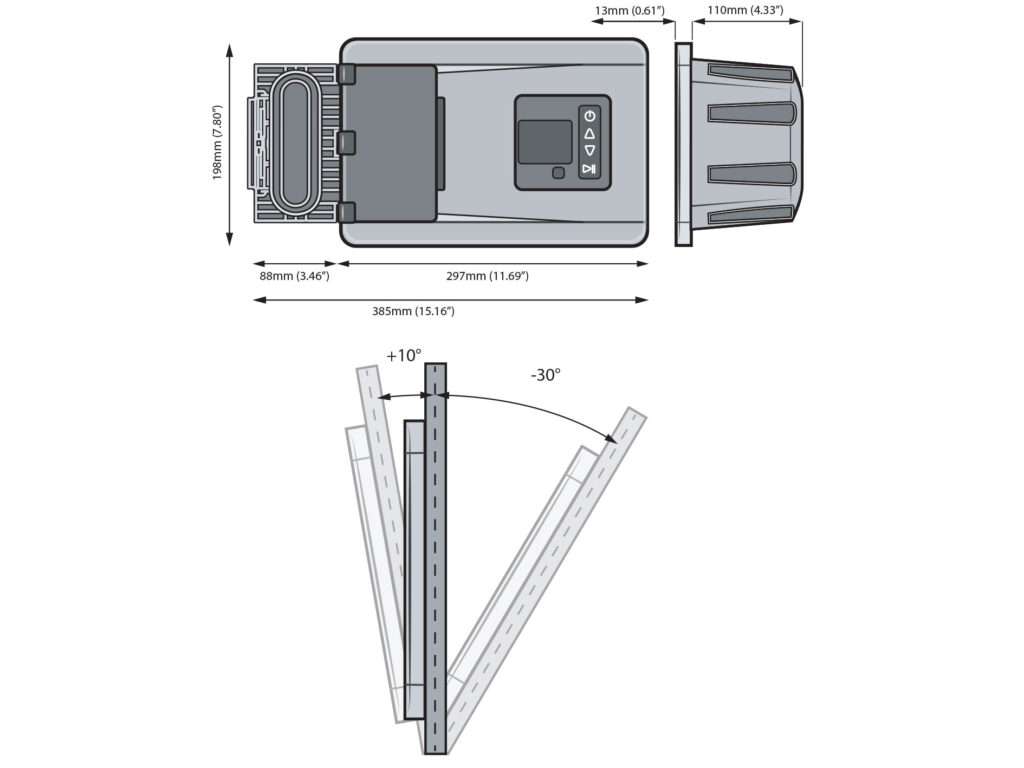
The Atmos must be flush-mounted on a flat surface ranging from plus-10 to minus-30 degrees from vertical to prevent the accumulation of water in the door chamber or pump housing. Avoid curved surfaces. Allow for at least 12 ½ inches (horizontal) by 8 ½ inches (vertical) to accommodate the faceplate and supplied sun cover, as well as an additional 3 ½ inches of clearance on the left side of the faceplate for the door to the inflator ports to swing open. Also ensure that there is at least 4 ½ inches of depth behind the mounting surface and that nothing will interfere behind the mounting surface with making the cutout.
Create the Cutout
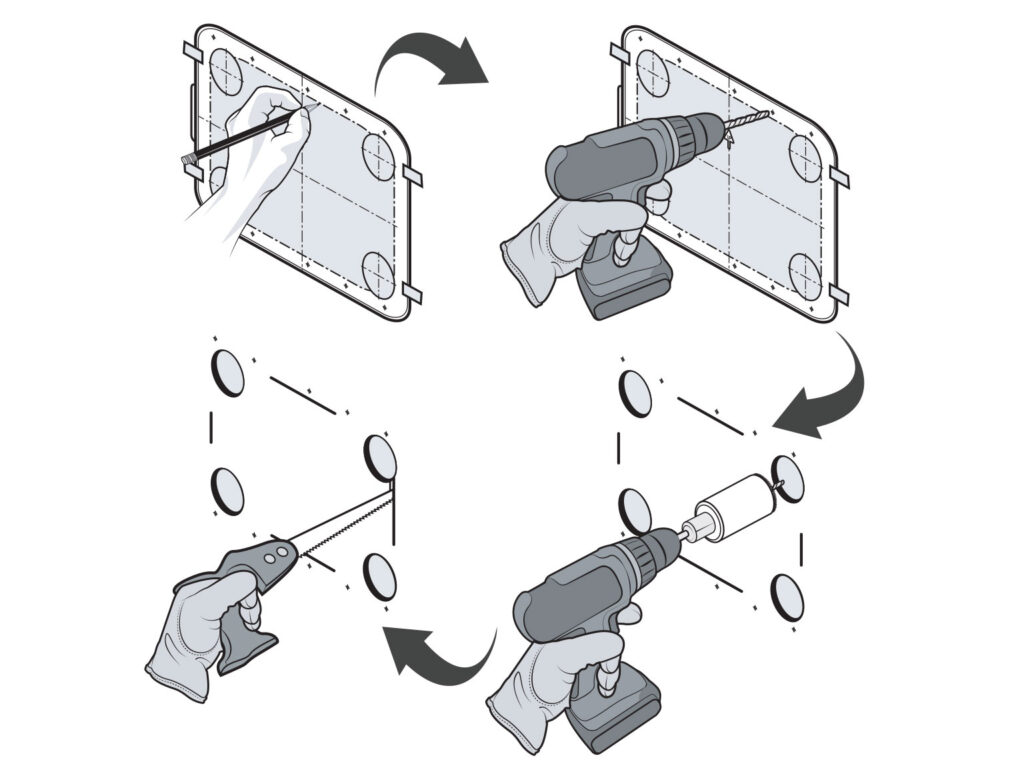
Mask off the area to help prevent scratching the boat finish during installation. Cut out the supplied template, and tape it into position. Use a 1 ¾-inch hole saw to cut each of the four corners, then follow up with thin-kerf hand or power saw to cut along the four lines that connect them. Next, drill pilot holes for the 10 self-tapping mounting screws. For soft material such as plywood or roto-molded plastic, use a 5/64-inch diameter drill bit; for harder material such as fiberglass, acrylic or hardwood, use a 3/32-inch drill bit. On a gelcoat surface, lightly chamfer each hole with a countersink to help prevent chipping.

Install the Unit
Remove the masking tape, and slide the unit into the cutout. The waterproof Atmos does not come with sealing gasket, but if you’re worried about water intrusion, lay a fine line of silicone sealant around the perimeter, and dab each of the screws with sealant. Align the 10 mounting holes (five each on the top and bottom) of the faceplate with the pilot holes on the mounting surface, and drive in the supplied No. 4 self-tapping stainless-steel screws. Do not overtighten at the risk of cracking the plastic flange of the faceplate. Install the upper and lower snap covers that hide the heads of the screws and give the installation a seamless look.
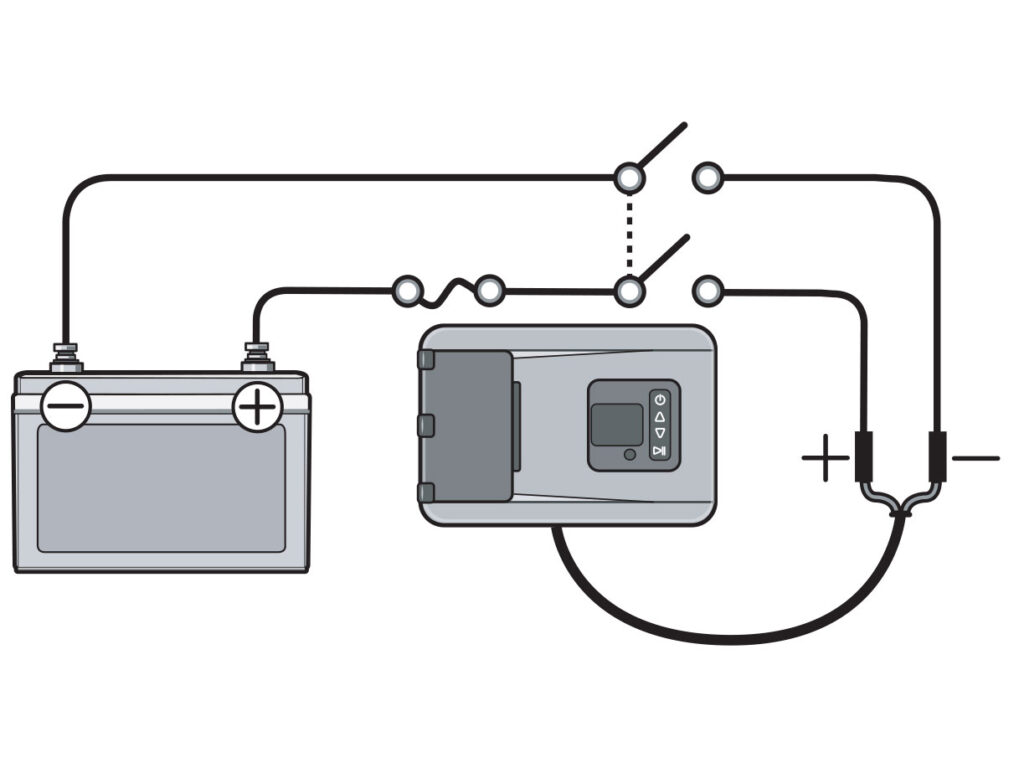
Connect to Power
The Atmos comes with a two-wire 12-volt DC power cord that includes a positive (red) wire and a negative (black) wire. Connect the red wire to a positive bus bar that is connected to an on/off switch from the boat’s battery with a fuse or resettable circuit breaker between the battery and switch. Connect the black wire to a negative bus bar that’s connected to a common ground. Connect with terminals that are soldered or crimped on and covered with heat-shrink tubing to thwart moisture and corrosion. Support the wires throughout their run, and install anti-chafe grommets where the wires pass through bulkheads or decks.
Read Next: How to Patch an Inflatable Dinghy
Test the System
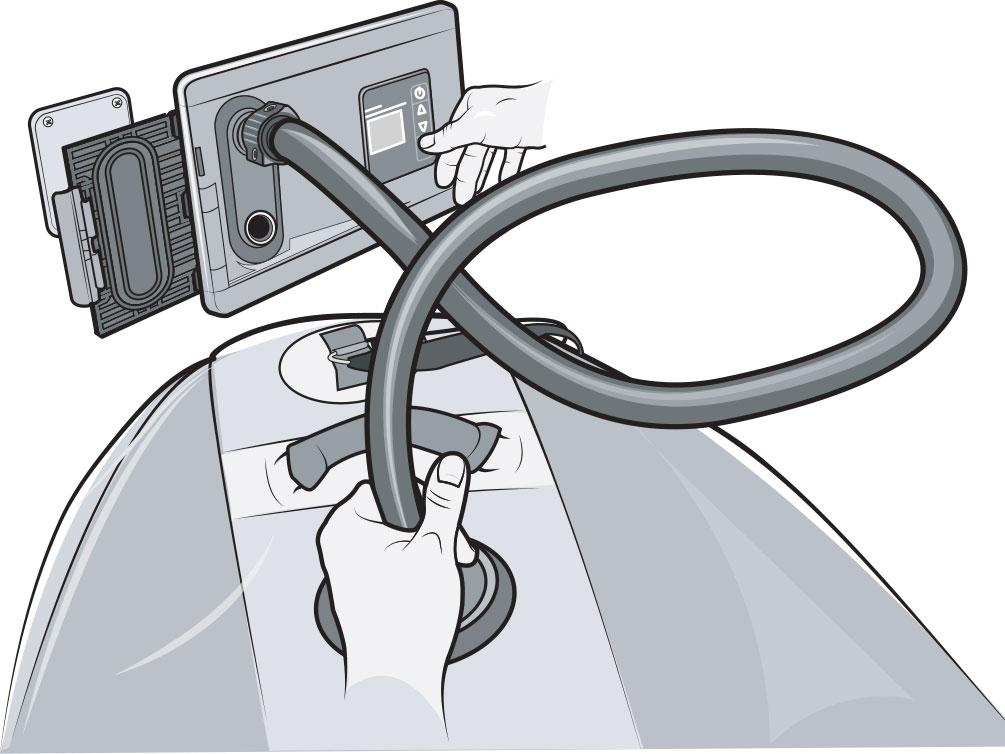
To make sure the Atmos system is working properly and that you grow familiar with its operation, pull out one of your towable water toys or other inflatable and follow the directions in the owner’s manual to blow it up. Then do the reverse, using the Atmos to deflate your towable. If you encounter any issues, refer to the troubleshooting guide in the owner’s manual to track down, address and correct the problem. When you’re done operating the Atmos, be sure to close the door that hides the inflate and deflate ports, cover the faceplate with the included sun cover, and turn off the switch suppling power to the Atmos air station.