To compare the performance of Interlux Pacifica Plus, Pettit Hydrocoat and Easy-On Bottom Wax, I made a test panel of fiberglass-encapsulated plywood, replicating the myriad of boat transoms on the water. Even if you aren’t interested in bottom paint, it serves as a quick and dirty fiberglass repair tutorial. Here it is in detail.
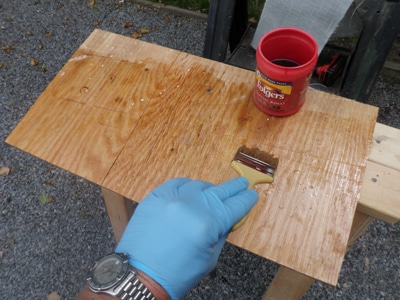
•Step I: I pre-coated a 1-by-3-foot piece of half-inch marine plywood with catalyzed polyester resin. If you don’t pre-coat wood with resin, when you apply the cloth, the wood will suck away the resin applied to the cloth and hinder adhesion, resulting in resin starvation, aka “never bond.”
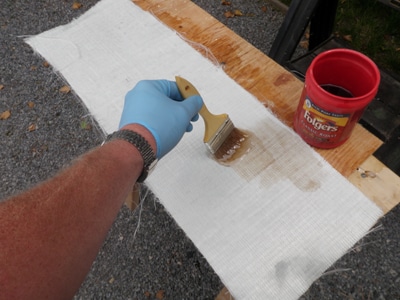
•Step II: After about 15 minutes, once the resin “kicked” and got a little tacky, I rolled a layer of biaxial cloth that I had wrapped around a dowel onto the panel. I then brushed on more resin — just enough to make the cloth go translucent, with no white spots showing. After this coat cured, I applied two more coats of catalyzed resin to fill the weave of the cloth.
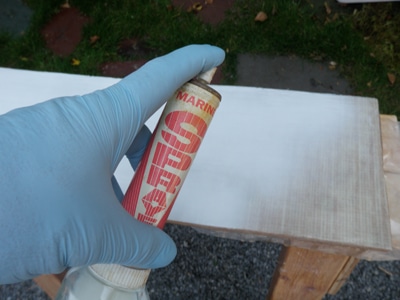
•Step III: Since I used a roller to smooth on a piece of 6-mil greenhouse plastic (available at hardware stores) on top of the last coat of resin, I didn’t have much sanding to do. Once the resin cured, I peeled off the plastic sheet, gave the panel a few swipes with some 120-grit paper on a block and then applied gelcoat using a Preval sprayer. I’ve been using these handy aerosol sprayers for all sorts of repair projects for decades. They are cheap and work well. Gelcoat was applied to a 20-mil wet film thickness, which is typical for production boats. How do I know how thick the film is? I have a film thickness gauge — doesn’t everybody? — which I will describe in a subsequent post.
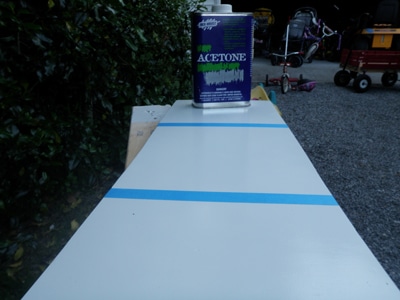
•Step IV: When the gel cured, I divided the panel in three using masking tape. Each 1-by-1-foot square will get the manufacturer-recommended number of coats and film thickness, as measured by my trusty wet-film thickness gauge.
In Part Three I’ll discuss the application of each product and how each differs with respect to ease of use, re-coat times and times to launch, plus some subjective musings from an experienced user of marine coatings. (That would be me.)
Click here for:
Click Here for Part 1
Click Here for Part 2
Click Here for Part 3
Click Here for Part 4
Click Here for Part 4a
Click Here for Part 5
Click Here for Part 6
Click Here for Part 7