Boat fuel gauges can be troublesome. Here is a quick method of determining whether the fault lies in your boat’s fuel gauge or in the fuel gauge sending unit on the tank. You may need a partner to complete this simple task, depending upon how you proceed.
Analog fuel gauges for boats can be troublesome. Here is a quick method of determining whether the fault lies in your boat’s fuel gauge or in the fuel gauge sending unit on the tank. You may need a partner to complete this simple task, depending upon how you proceed.
Step 1:
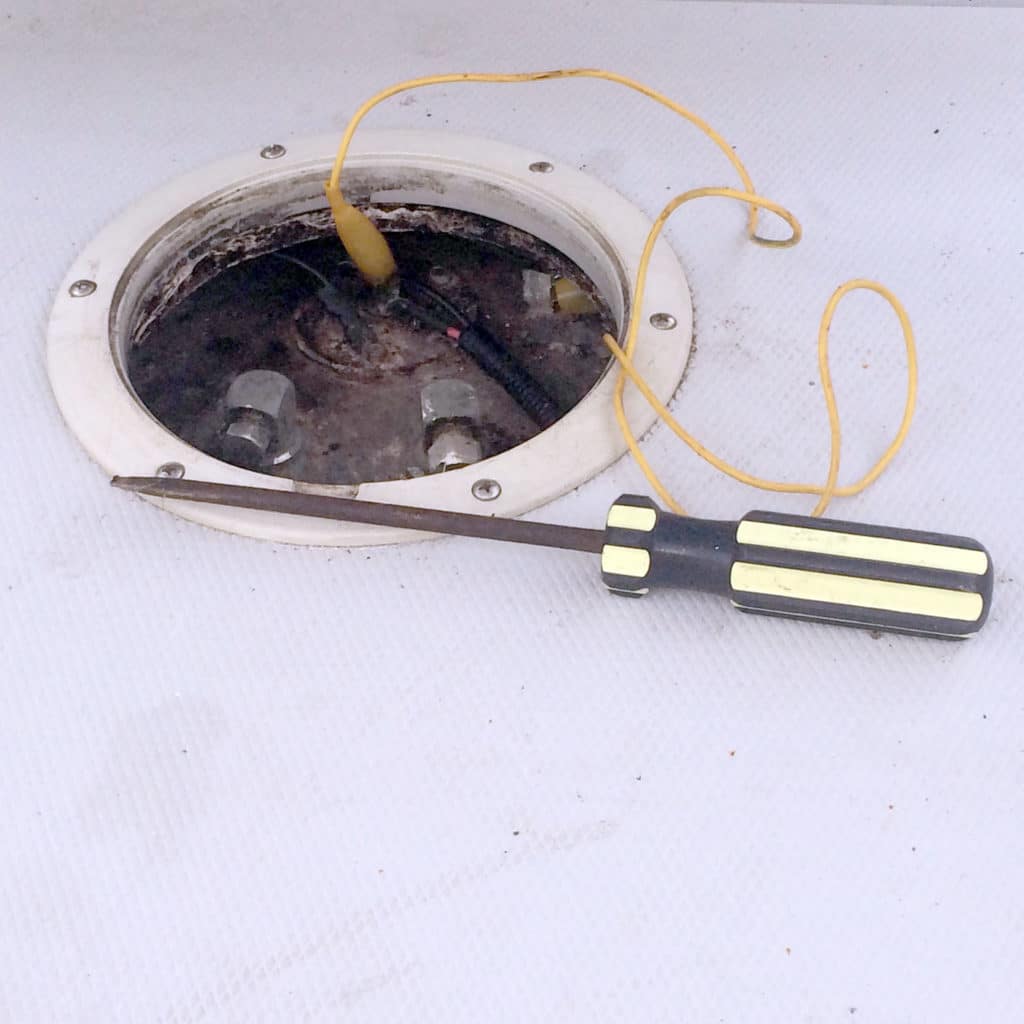
Locate the boat fuel sending unit. This is often accessed through a deck plate placed over the aft end of the tank. What you will see is a small, round plate fastened to the tank with five screws and with two wires connected to it.
Step 2:
Identify the sender conductor. (Pink is the ABYC-designated wire color for the conductor leading from sender to fuel gauge.) It should be attached to the center of the sending unit.
Step 3:
Identify the ground conductor. In most cases this will be black.
Step 4:
Turn the ignition key to on, or otherwise energize your gauge panel so that the fuel gauge is operable.
Step 5:
Using the barrel of a screwdriver or a jumper wire, connect (“jump”) the sender’s connection to the ground connection. Now, have your helper read the gauge for you. If you used a jumper wire, you can leave it in place and go read the gauge yourself.
Step 6:
If after “grounding out” the sender the gauge reads Full, then the problem is with the sender; if the gauge does not respond then the problem is with the gauge. If the problem is with the gauge or its wiring, start by performing a continuity check of the gauge wiring.
More Boating Tips Of The Month


