Unless you are an expert welder who also happens to have access to a hydraulic press, the chances of your completing a major propeller repair or reconditioning job successfully are slim and none. And Slim doesn’t work here anymore.
That doesn’t mean you shouldn’t perform minor repair and maintenance. After all, even small imperfections can impact performance and the mechanical integrity of your driveline.
Here are three DIY propeller maintenance tasks.
Fixing a Ding
Perhaps you whacked flotsam or jetsam at night, or maybe you too enthusiastically chased the school of fish into the boulder garden. Whatever. Your propeller now has a moon-shaped bend in the edge of one blade. You can likely make the propeller usable until you can send it out for recon. You’ll need two adjustable wrenches — aka crescent wrenches — to complete this task.
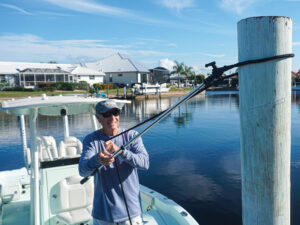
Affix the jaws of one wrench on the edge of the blade adjacent to the dinged area. Affix the jaws of the other wrench onto the ding itself. Holding the first wrench firmly to prevent the entire blade edge from bending, slowly apply pressure to the wrench on the ding. You should be able to work most, if not all, of the unfairness out of the blade edge.
LEARN ABOUT HIGH-TECH PROP REPAIR
Filing Burrs
The edge of a propeller’s blade gets burred — or rolled over — when the prop rotates through sand. Up close, the prop may look finely saw-toothed right on the blade edge. By rubbing the tip of your thumb over the edge, you can feel the burr.
A hardware store mill bastard file can help you remove the burr and return the edge of the blade to fair, so that less air is generated and water is released smoothly once again. Working from the back of the blade toward the edge, hold the file at as steep an angle as possible to help ensure that you remove as little material as possible. You will be removing some metal — and thus changing the size of the blade minutely. Every few strokes, check for the burr with your thumb, like you would when sharpening a knife. Again as with a knife, stop when you are done (the burr is no longer felt).
Spun Hub or…
Outboard propellers are fitted with an inner hub made of a material designed to shear away upon heavy impact, and so protect the drivetrain from shock damage. When the hub shears, it’s known as “spinning the hub.” Usually, there is enough friction with a spun hub to allow you to operate the engine at low rpm. But when you try to get on plane, the tach rises and the water churns but the boat doesn’t accelerate because the shaft is spinning in the hub. This is how it’s meant to work — the low-rpm friction providing the ability to get home.
But how do you know if your hub is spun or you are having some other problem with the same high engine speed/low boat speed symptoms? Sometimes, a hub hasn’t fully broken but is only on the way out, and the symptoms come and go. So how do you know?
One way is to place a mark or scratch across the inner and outer hub with nail polish, a marker or an awl. If you’ve spun a hub, a simple visual inspection will show your line or scratch as broken.

Marking a prop hub to indicate a “spun hub.”
Quick Tip: It makes sense to carry a spare prop and prop hardware aboard. Tie a lanyard to your wrench when working on a prop in the water.

