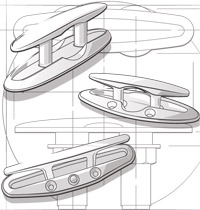
The low-profile design of retractable cleats eliminates tripping hazards and snag points and preserves a boat’s sleek lines. Yet these cleats are quickly accessible. Pop-up cleats are spring-loaded — push a button to elevate the business end. Pull-up versions require that you manually lift the cleat, with detents to keep it in position. A downward push tucks both cleat types virtually flush with the deck.
Nearly all are stainless steel and come in a variety of styles and sizes from brands such as Accon (acconmarine.com), Attwood (attwoodmarine.com), Sea Choice (seachoice.com), Sea-Dog (sea-dog.com) and Whitecap (whitecapindustries.net), each with a slightly different installation procedure, but most requiring a larger hole than conventional cleats, as well as drain cups to keep water from leaking below deck.
Time to Complete: >2 Hours per Cleat
Skill Level: 3/5
Tools and Supplies
*Accon Wide-Line Series pull-up 6-inch cleat ($72.35 each, shop.acconmarine.com)
*Waterproofing cup ($4.82 each, shop.acconmarine.com)
*3/8-inch push-in impact drain fittings, model PD-2 (95 cents, duskyonline.com)
*3/8-inch-ID clear vinyl hose ($4.43/10 feet, amazon.com)
*3M 4200 marine sealant ($16.99/10-ounce cartridge, jamestowndistributors.com)
*Caulking gun
*Masking tape
*Finishing resin (to seal exposed plywood core)
*Power drill and 3/8-inch bit
*1-inch hole saw
*Power jigsaw with a fine blade
*Socket- or box-wrench set
*Shears (to cut the vinyl tubing)
*Cleanup rags (to wipe off excess sealant)
1. Select the Cleat
Base your selection on the mounting location and size of your boat. If replacing conventional cleats, select the same size cleats (if not larger). Retractable cleats have a bigger footprint. This might help cover holes left from the previous cleat; otherwise patch the old holes. Make sure the mounting studs or bolts are long enough and you have access to the underside. For this project, we chose the Accon Wide-Line Series 6-inch pull-up cleat.
2. Mark and Cut the Mounting Holes
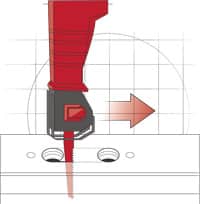
Use the supplied backing plate as a template to mark the mounting holes and central cutout, making sure that the underside is clear of wires or hoses before you start work. Cut the mounting holes with a drill motor and 3/8-inch bit, but use a 1-inch hole saw and jigsaw for the central cutout. If the underside of the deck is plywood, apply a light coat of catalyzed finishing resin to the exposed wood to seal it from moisture, allowing it to cure before moving to the next step.

3. Mount the Cleat
Mask off the area, and then bed the mounting surface generously with a marine sealant, such as 3M 4200, and position the faceplate. Cleats like this Accon model have welded mounting studs; others bolt up through the faceplate. Position the drain cup and backing plate on the underside, and then the washers and locknuts. Tighten the locknuts. Once the cleat is snug, clean up the excess sealant and remove the masking tape.

4. Install the Drain
On models such as the Attwood Neat Cleat, the drain cup is attached last, while the cup for this Accon model is installed with the cleat. In either case, attach 3/8-inch-inside-diameter vinyl tubing to the hose barb at the bottom of the cup; then route the tubing to a suitable drain location. For the drain fitting, use a T-H Marine 3/8-inch push-in impact drain (visit boatingmag.com/rod-holder-drains). Many fishing boats won’t require the drain, since the gunwales are open to the self-bailing cockpit.
Torque It Twice
Allow the underlying sealant to cure for a day or two after you have initially battened the cleat, and then tighten the fasteners just a quarter- or half-turn more. This creates a gasket that helps ensure a secure and watertight installation.

No Cutout Required
If you’re reluctant to take a jigsaw to your deck, there are pull-up cleats that forgo a central cutout, including the Accon 450 series, Attwood Neat Cleat and Sea-Dog 41420 series. These require only two holes, albeit large ones, for which you’ll need a hole saw.

