Aluminum fuel tanks can corrode in a marine environment, though much depends on how well they are protected belowdecks from salt water. Shielded from briny water, tanks can last forever, but on some boats, salt water may seep through seams in the deck, slosh onto the tank from the bilge space below it, and/or become trapped between the tank and foam flotation inside the boat, leading to corrosion and eventually leaks.
Such was the case with the aluminum gasoline fuel tank in our 1986 21-foot center-console project boat. Corrosion-wrought pin holes had developed on top of the 15-year-old tank, and the plate for the fuel-gauge sending unit no longer sealed tight because of rampant oxidation on the tank’s mating surface. In short, it was time for a new tank.
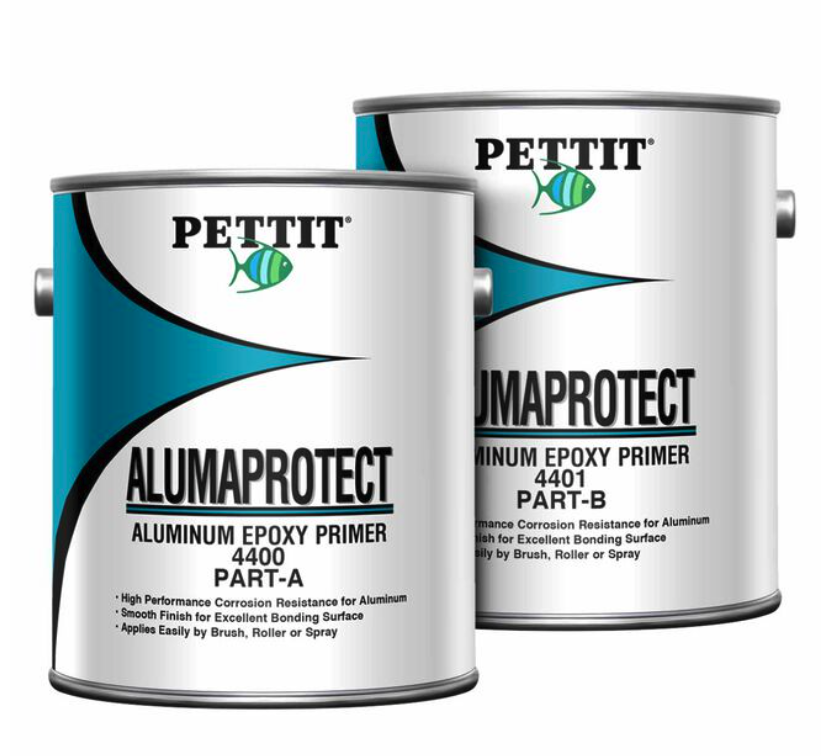
We commissioned a new 75-gallon tank, but before installation, we wanted to give the aluminum surface a protective coating to thwart corrosion and help forestall the need to replace it again for decades to come. We turned to Pettit Marine Paint’s AlumaProtect two-part aluminum epoxy primer, followed by Pettit’s EZ-Poxy polyurethane topside paint.
While each step outlined below is critical, the main ingredient is the AlumaProtect primer. Its bright-yellow strontium-chromate formula is the same coating used to protect aluminum airplane components. Before you get started, put on personal protective equipment, including a paint suit, rubber gloves, eye protection and the proper respirator, and make sure you work in a well-ventilated area.
Skill Level: 2 of 5
Finish Time: Approx. 2.5 hours (excluding drying time)
Tools and Supplies
- Pettit AlumaProtect 4400/4401 two-part aluminum epoxy primer kit ($145.99 per 0.375-gallon each of parts A and B; westmarine.com)
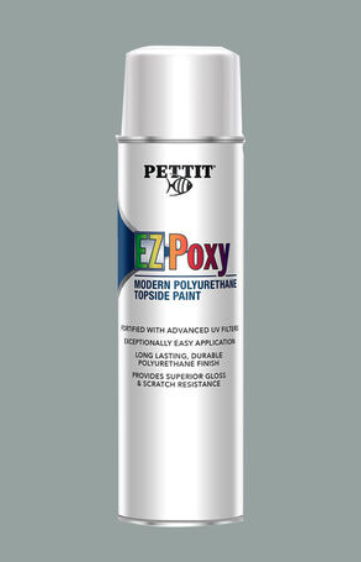
- Pettit EZ-Poxy 3711 Platinum Gray polyurethane topside paint or color of your choice ($29.99 per 16.93-ounce aerosol can; westmarine.com)
- Translucent graduated mixing pails (2)
- Solvent-resistant roller trays (2)
- 4-inch foam rollers (2) and roller handle
- Masking tape
- 120- and 220-grit sandpaper
- Orbital sander
- Air compressor
- Tack cloth
- Personal protection equipment (paint suit, respirator, eye protection, rubber gloves)

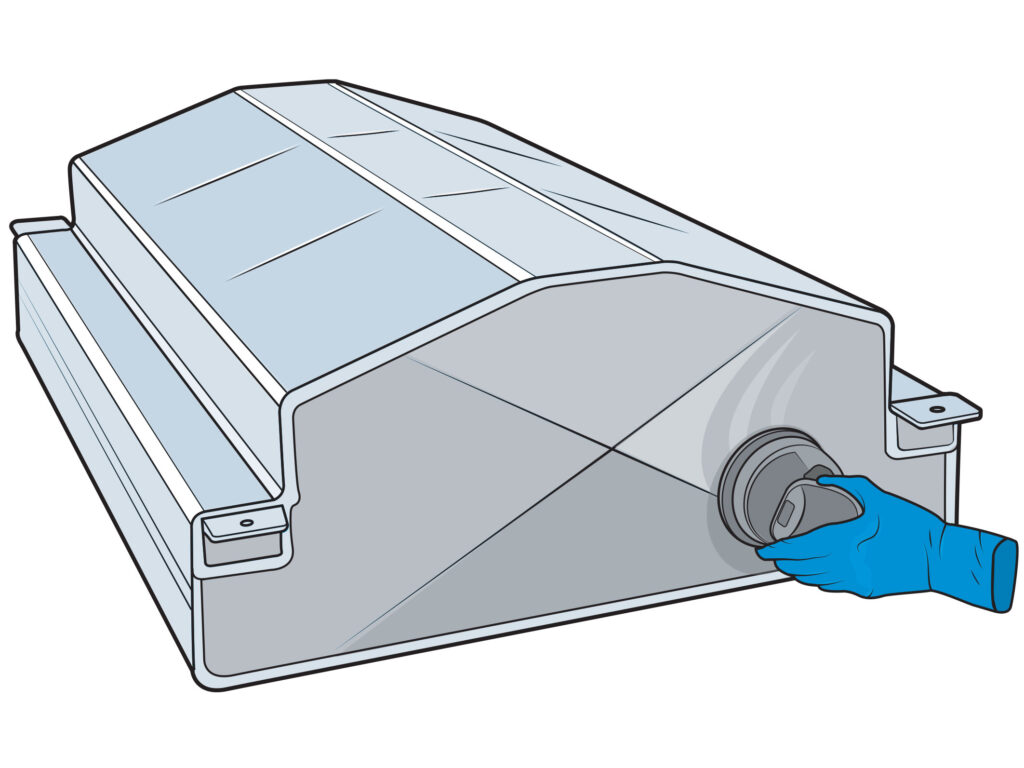
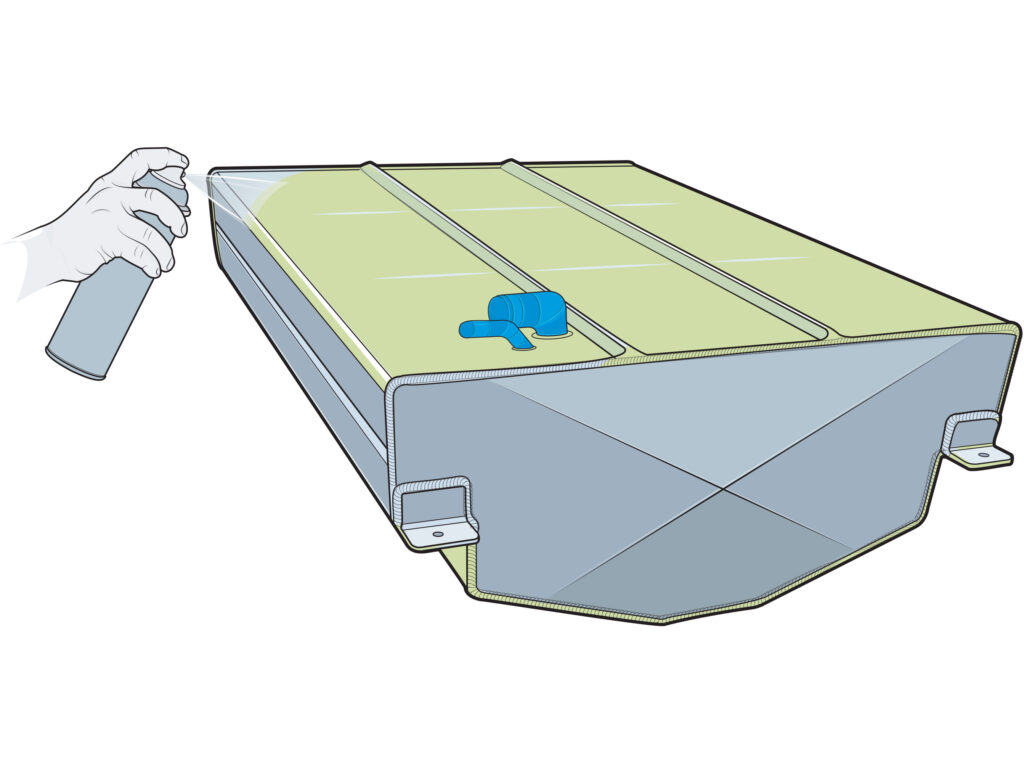
Mask off Fittings
Many new marine fuel tanks are delivered with plastic caps on the fittings for the fuel fill, vent, and fuel pickup. Keep these in place until completely done painting the tank. In addition, mask off the fittings where the hoses will slide on to prevent later contamination of the fuel with paint residue. Mask off the plate for the fuel-gauge sending units and the tab or tabs for the tank grounding wires. These two wires (a green one connected to the fuel fill and a black one to ship’s ground) need a clean metal surface for effective grounding to help prevent the buildup of static electricity when later filling up the fuel tank.
Scuff up the Surface
With the tank exterior free of grease, oil and other contaminants, abrade the entire aluminum surface finish using an orbital sander fitted with 120-grit sandpaper. This will assure adhesion of the AlumaProtect primer. Reduce the tank’s exterior to a dull finish on the top, bottom and sides. Spots that are hard to reach such as corners and under the fill and vent fittings can be sanded by hand. Wearing rubber gloves will prevent contaminating the surface with oil from your hands. Once you’ve scuffed up the surface, use compressed air to blow away sanding dust before moving to the next step.
Read Next: How to Apply the Propspeed Antifouling System

Apply AlumaProtect
Apply Pettit’s AlumaProtect epoxy the same day in which the tank is sanded because aluminum corrodes quickly. Stir parts A and B thoroughly, then combine them 1-to-1 in a translucent graduated mixing pail and mix thoroughly, then let stand per the instructions. On our 80-degree F workday, this was 15 minutes. Pour the mixture into a solvent-resistant roller tray, apply a thin coat with a 4-inch foam roller, and then let dry. Dry time was four hours, but it might take longer at cooler temperatures. Apply a thin second coat. It took less than a half-gallon of the epoxy mixture for our 75-gallon tank.
Tip: Marine fuel tanks come with a Coast Guard-required label on top that lists the name of the manufacturer, date of manufacture, type of fuel, volume, and verification of pressure testing. Do not remove this label, and take time to mask over it to ensure that the information is not covered by paint.
Apply EZ-Poxy
To further protect the aluminum tank exterior from moisture and corrosion and give the tank an aesthetically pleasing appearance, Pettit recommends that boaters apply two coats of Pettit EZ-Poxy polyurethane topside paint after the primer. The one-part paint can be rolled, brushed or sprayed. For boaters without sprayers, Pettit makes EZ-Poxy available in aerosol spray cans, which we chose. Available in a number of shades, the EZ-Poxy Platinum Gray seemed perfect for our application. Apply an even, thin first coat in a fan pattern, ensuring that the entire tank is covered. Allow the first coat to dry for 16 hours.
Tip: For the best results, avoid temperatures below 50 degrees F and days of high humidity and/or rain. Ideally, temperatures should be above 75 degrees F.

Sand and Recoat
Within 24 hours after the first coat, sanding is not required before recoating; if after 24 hours, lightly sand with 220-grit sandpaper, taking care not to sand through the AlumaProtect primer. Once done, wipe the entire surface with a tack cloth. If no sanding took place, ensure that airborne contamination has been removed from the surface. Apply an even, thin second coat of EZ-Poxy in a fan pattern, once again making sure that the entire exterior surface of the tank is recoated. Let the second coat dry for 16 hours, then carefully remove the masking tape. It required almost two 16.93-ounce aerosol cans of EZ-Poxy to paint the tank.
Tip: Hanging the tank from a tree limb or other elevated object while painting makes this project go faster. If not, you need to paint the top, let it dry, and then flip the tank over and paint the bottom, as we did. This about doubles the time needed to complete the job.