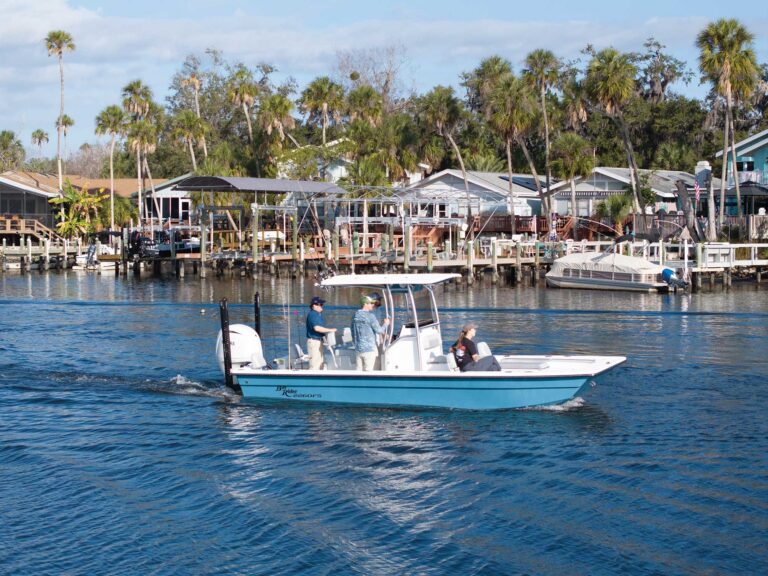
For many years, I boated on the Pacific Ocean without radar, largely because I did not have a suitable location to mount a rotating scanner or dome and, to be blunt, disposable income was hard to come by in my younger days. However, once my earnings grew sufficiently, I commissioned a hardtop for my 21-foot center-console (which gave me a place to install a dome) and bought a radar.
I shudder to think about those early years without radar. Today, I would not do it. Where I boat, you never know when dense fog will roll in, severely impairing visibility and safe navigation. What’s more, radar enables safer boating when cruising at night.
The good news is that today’s radar systems from brands such as Furuno, Garmin, Lowrance, Raymarine, and Simrad are relatively affordable and easy to install—though you still need a high mounting point for a rotating scanner or dome. Systems using radar domes prove compact enough to fit boats as small 18 feet in length, and most network with compatible multifunction displays, so you don’t need to find space for a separate display at the helm. In addition, digital radar systems consume far less power than the old-school magnetron radars.
For this project, I installed a 20-inch-diameter, 24-mile-range Lowrance Halo20 dome radar on my 21-foot center-console, replacing an older Lowrance Broadband 4G radar. I paired it with an existing Lowrance HDS-12 Live MFD, which has two Ethernet ports and is compatible with this radar. The Halo20 features pulse-compression technology, MARPA target tracking, and other advanced capabilities, and is Lowrance’s most budget-friendly radar.
Skill Level: 2 of 5
Finish Time: Approx. 3-4 hours
Tools and Supplies
- Lowrance Halo20 Pulse Compression Radar (amazon.com)
- Edson 6-inch Aft-Angled Vision Radar Mount (amazon.com)
- Blue Sea System CableClam No.1002 (amazon.com)
- Electrician’s snake
- Mouse (aka pull) cord
- Electrical tape
- Socket and box/open end wrench sets
- Torque wrench
- Crimping tool
- Power drill and bits
- Phillips screwdriver
- Zip ties and zip-tie mounts (to secure cabling)
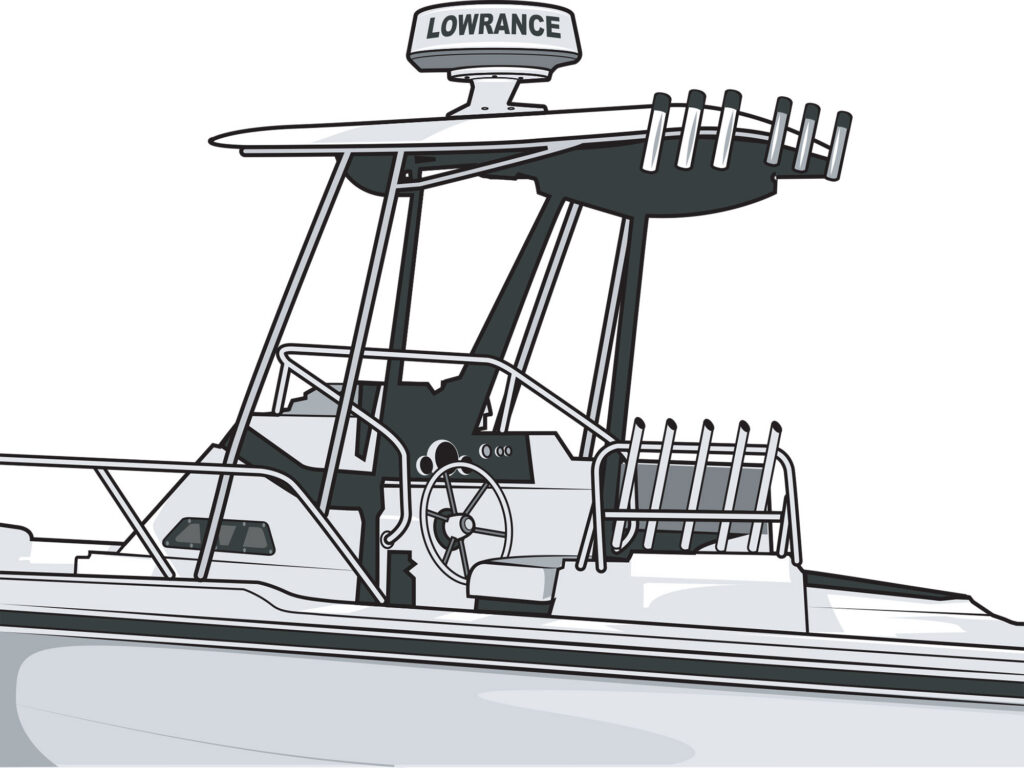
Dome Location
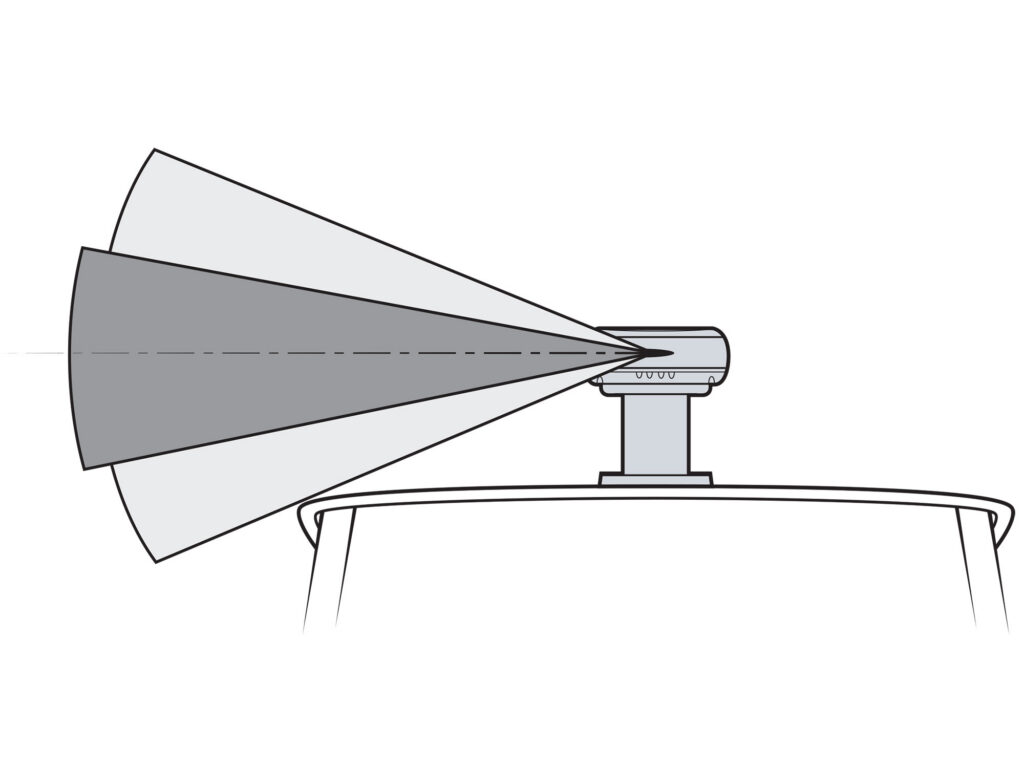
The radar dome must be located high above the boat’s centerline. In this case, we chose the hardtop. Due to the radar’s high sensitivity, we elevated the dome on a 6-inch-tall pedestal (already secured to the T-top) so the beam would clear the roofline. The bolt pattern for the 4G and Halo20 are the same. The supplied 16.4-foot-long radar cable had sufficient length to reach from the dome to the backside of the helm. We also checked to ensure the breather hole at the aft bottom of the dome would not be blocked.
Tip: Radar pedestals are available from Edson ($322 for a 6-inch aft-angled riser; edsonmarine.com) and Seaview ($422.74 for 5-inch aft-angled riser; seaviewglobal.com).
Route the Cable
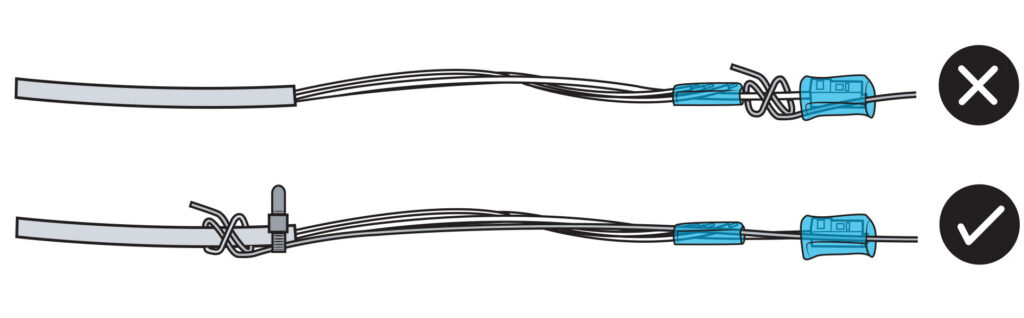
Connect a “mouse line” (aka pull line) to route the radar interconnection cable from the dome down through the appropriate rigging tubes and legs on the T-top, so the Ethernet RJ45 connector emerges at the back of the helm area. To prevent damage to the Ethernet wires or RJ45 connector, attach the mouse line to the stronger outer jacket of the cable. Use small cable ties to secure the mouse line to the outer jacket, and tape the wires and RJ45 connector to the line so they don’t get caught or bent backward.
Tip: To ensure the cable entry on the roof of the hardtop was waterproof, I used the Blue Sea Systems CableClam No.1002 to create a watertight pass-through.
Install the Dome
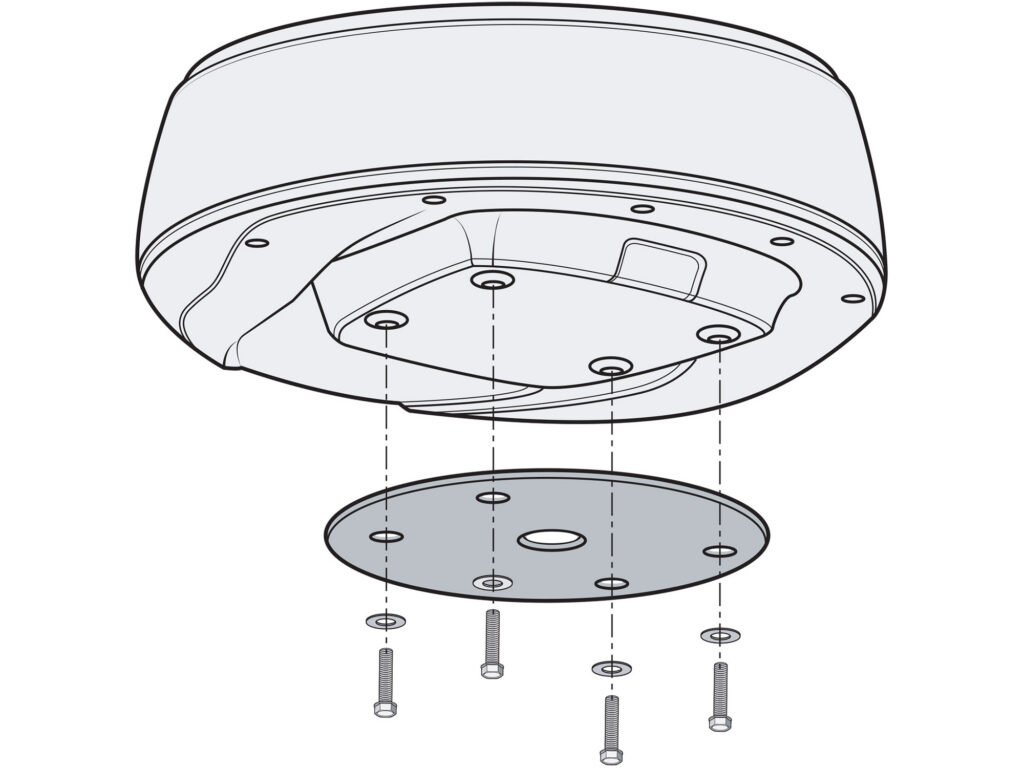
Before bolting on the dome, insert the interconnection cable connector into the socket on the underside of the dome, and rotate the locking collar on the connector clockwise until it clicks. Place the cable into the retention channel under the dome and install the two cable retainers with the supplied screws. Align the bottom of the dome over the four bolt holes in the pedestal. Place a lock washer and plain washer onto each of the four supplied bolts; thread each into the dome’s mounting holes and tighten to 8.9 to 13.3 pound-feet.
Ethernet Connection
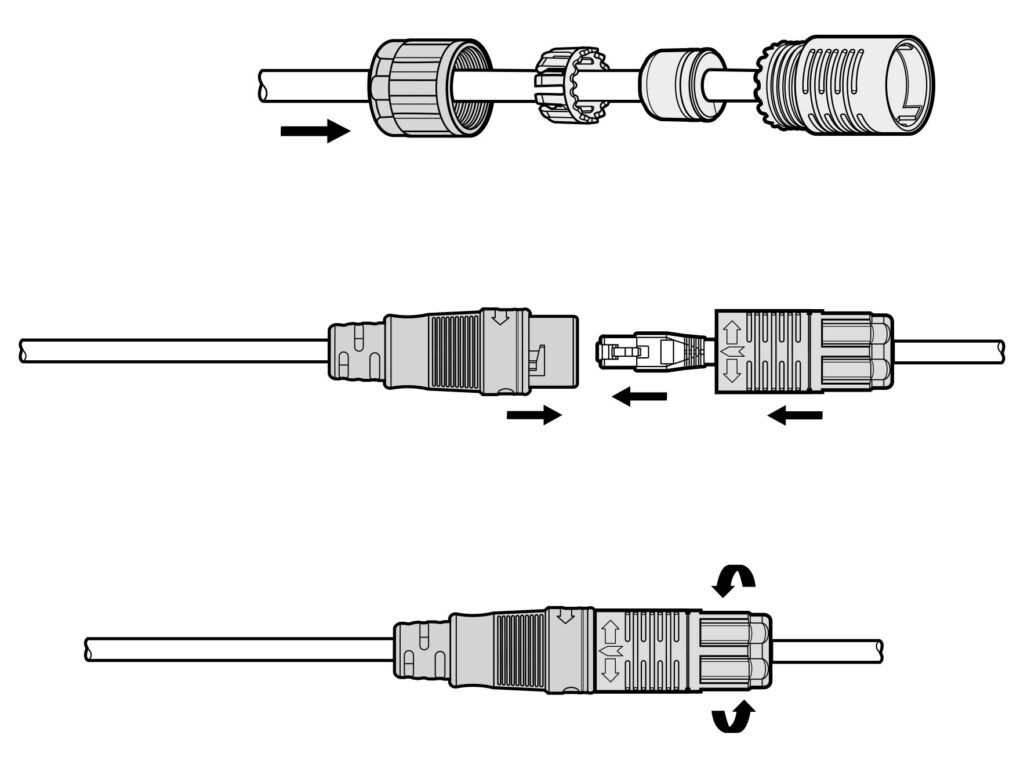
Plug the supplied Ethernet adapter cable into an Ethernet port on the MFD and route the other end of cable to the RJ45 socket on the interconnection cable. Slide the boot parts over the interconnection cable. Connect the two cables by inserting the RJ45 socket; then turn and lock the cable boot to the adapter cable. Tighten the boot gland. Depending on the length of the cable run, you might have interconnection cable left over. Carefully coil it up and secure it with cable clamps behind the helm area.
Replacing a Broadband 3G/4G Radar: If you are replacing a Lowrance Broadband 3G or 4G radar with a Halo20, you can use the existing cabling, which can save installation time and labor. However, you will need to use a special adapter cable to connect the Halo20 dome. Also, if you were using the RI-10 radar interface box and wiring behind the helm for a 4G unit, Lowrance recommends removing the box and reterminating the connector on the end of the interconnection cable with the appropriate tools to allow the waterproof cable boot to slide over the RJ45 connector. To learn more, visit lowrance.com.
Read Next: How to Install a Fixed-Mount Marine VHF Radio
Power Up
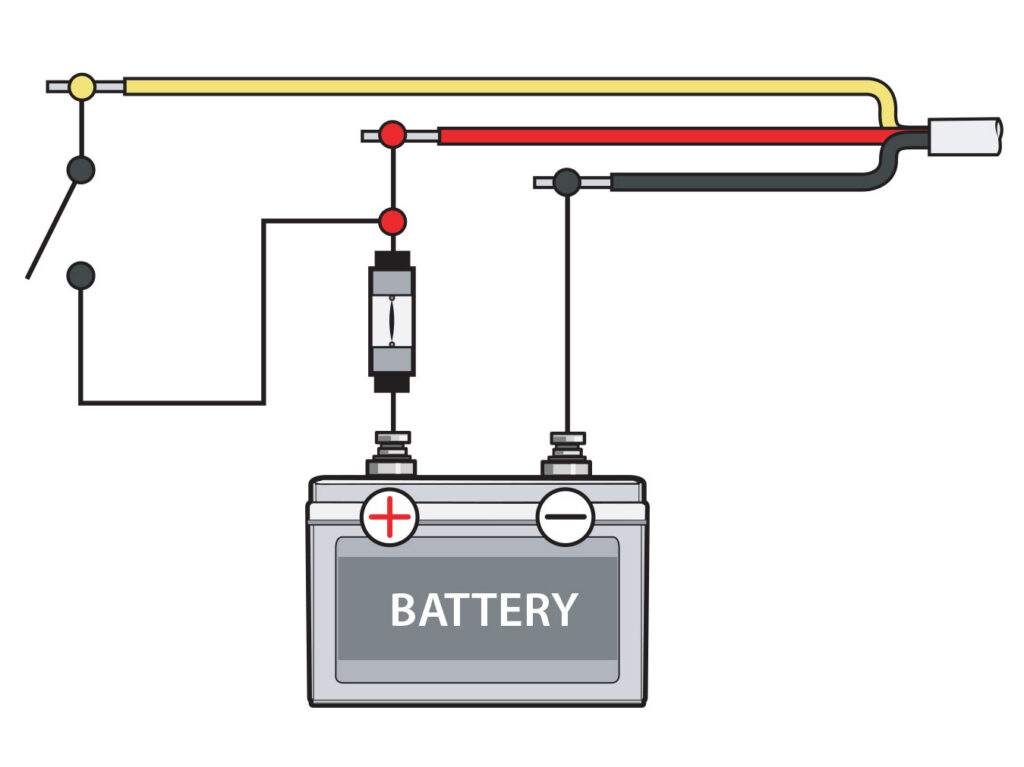
The manual offers a number of ways to configure power using the four wires branching off the interconnection cable. The simplest is to connect the yellow wire to the red wire after an inline 5-amp fuse; connect the combined wires to positive, switchable 12-volt DC power. Connect the black wire to ground. The bare shield wire is to be connected to a vessel hull ground to reduce interference, but it is not generally required. Power up the unit and follow the manual to configure the Halo20 radar.