Most boat trailers employ bunk boards to cradle the hull during towing and storage. In fact, many boats spend far more time on wood bunks than they do in the water, so these boards should be inspected regularly for excessive wear or broken lumber.
A bunk that snaps or falls off results in a loss of support that affects trailer balance and exposes the hull to the metal cross members, axles, bunk brackets and other structures that can gouge or puncture a boat.
If you see signs of a damaged bunk, replace it as soon as possible. With bunks that are more than a few years old, replace them all at the same time. The process is easy, but you will need to remove the boat from the trailer to take off the old bunks and install the new ones.
Read Next: How to Rewire Your Boat Trailer
One approach is to first build the replacement bunks, then tow the boat to the launch ramp, pull the boat off the trailer and tie it up as you swap out the old bunks for new ones in the parking lot, if permissible.
Skill Level: 1 out of 5
Finish Time: Approx. 1 hour per bunk
Tools and Supplies
- Common construction lumber to replace old bunks (8-foot two-by-four)
- Marine bunk carpeting for bunk boards (18-foot roll of 18-inch-wide black carpet, westmarine.com)
- 1 1/2-inch-long-by- 5/16-inch-diameter lag screws and washers (amazon.com)
- Wood sealant (Olympic Waterguard, amazon.com)
- Paintbrush
- Staple gun and 1/2-inch stainless-steel staples (amazon.com)
- Heavy-duty shears (to trim bunk carpet)
- Tape measure
- Power drill and 9/64-inch drill bit
- Marine silicone sealant
- Socket wrench set
- Saw (to cut boards to required length)
- Sharpie marker (to mark positions for pilot holes)

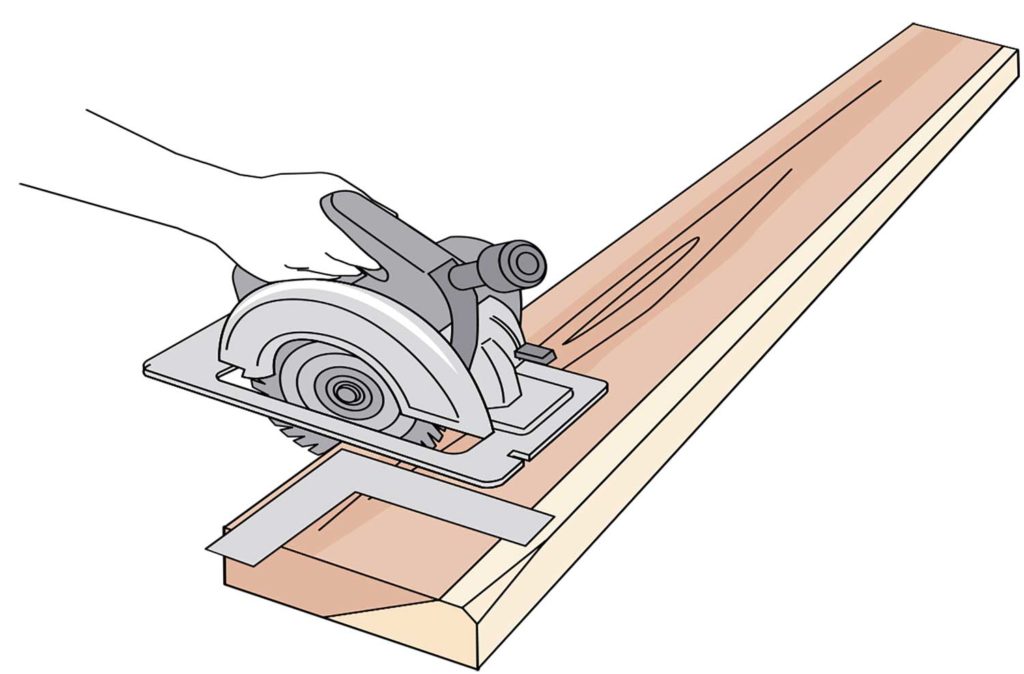
Determine if the board is a two-by-four, two-by-six, etc., keeping in mind that a two-by-four measures 1 1/2-by-3 1/2 inches, a two-by-six measures 1 1/2-by-5 1/2 inches, and so forth. Measure the length, and pick up the lumber at a home improvement center, making sure each is as straight and true as possible. I like common redwood, southern yellow pine or Douglas fir construction lumber. Some stores will cut boards to length, or you can trim them square with a Skill power saw or sharp handsaw.

Giving the wooden boards a coat or two of water sealant can help extend the useful life of your trailer bunks by minimizing soaked wood and eventual rot, especially since bunk carpeting and other covers tend to trap moisture next to the wood. Use a product such as Olympic Waterguard clear wood sealer, applying two coats over a two-day period to the entire board to ensure coverage and a good seal. Let the sealant on the wood dry completely before moving to the next step, which calls for covering the boards.

Most bunks are covered with marine polyester bunk carpet, available through marine retailers in a variety of widths, roll lengths and colors. This rot- and mildew-resistant covering cushions the hull while also allowing the boat to slide off and on the trailer. Cut the carpet to the length needed to cover the board using a tight gift-wrap fold and stainless- steel 1/2-inch-long staples. Staple only the underside and ends, leaving a smooth, staple-free surface on top where the hull meets the bunks.

Other DIY covering kits available for bunk boards include Gatorbak synthetic covers in a wide range of lengths, widths and colors, some with LED lighting underneath (boatingmag.com/story/how-to/installing-illuminated-boat-trailer-bunks). Kits start at $43.46. EZ Slide pads made from polyethylene in lengths up to 10 feet attach over bare wood or carpeting. Kits start at $29.95. Both of these alternate bunk coverings offer greater durability than carpet.

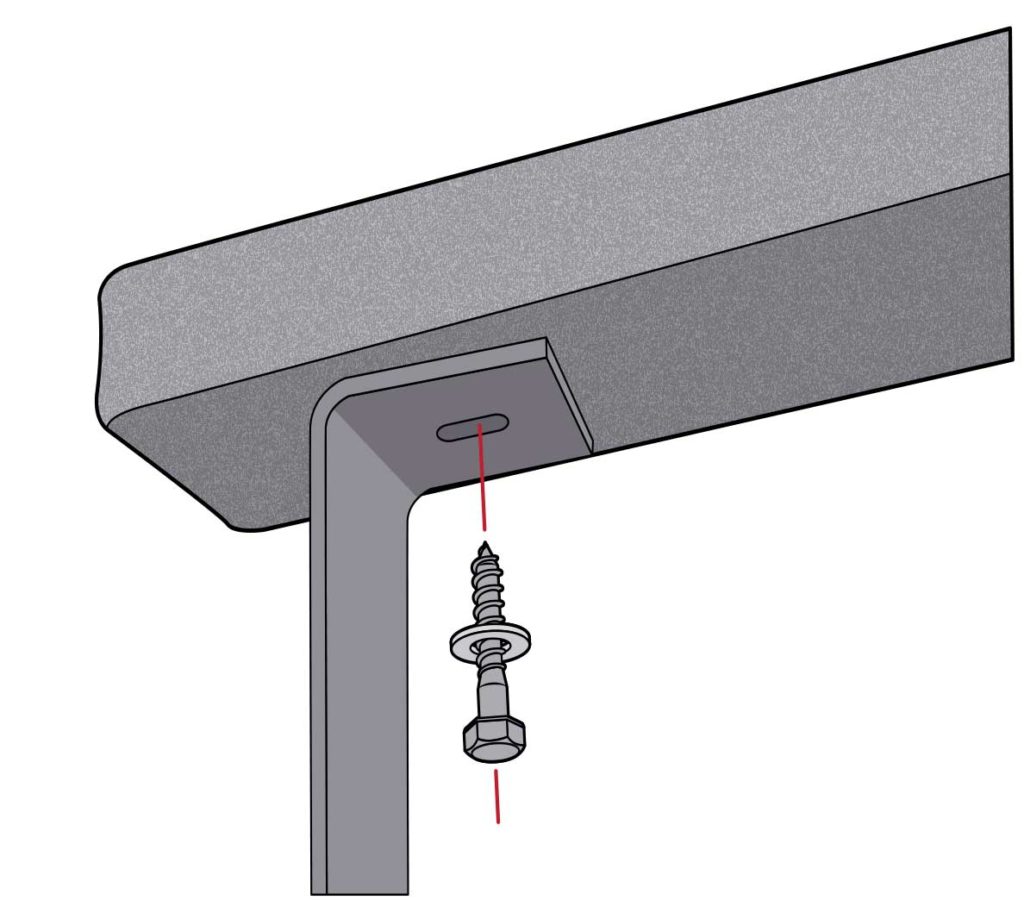
With the boat removed from the trailer, remove the fasteners from the old bunk and measure the distance of each mounting hole from the end of the bunk. Measure and mark those spots down the center of the backside of the new bunk, and drill a 9/64-inch pilot hole at each location. Don’t drill through the topside of the bunk. Squeeze silicone sealant into each hole, then lay the bunk in position on the brackets and drive lag screws (size is noted in the list of supplies) into the board to secure the bunk.

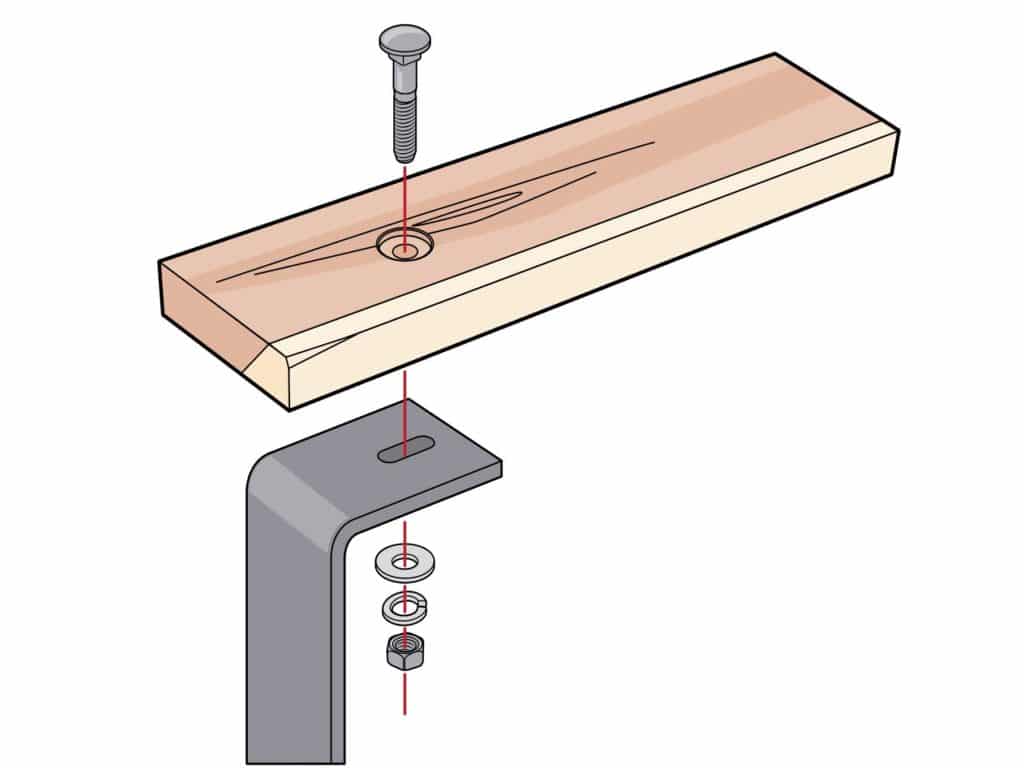
You can through-bolt bunk boards with carriage bolts. They must be installed before you put on the bunk carpet. Drill the appropriate- size holes in positions that match the bunk bracket mounting holes, then router a shallow recess on the topside of the bunk. Insert the carriage bolt from the top, and tap the head of the bolt firmly downward with a small hammer to seat the square shoulders of the bolt and ensure the head is below the surface of the wood. Now carpet the board. To install, use a flat washer, lock washer and nut to secure the bunk.


