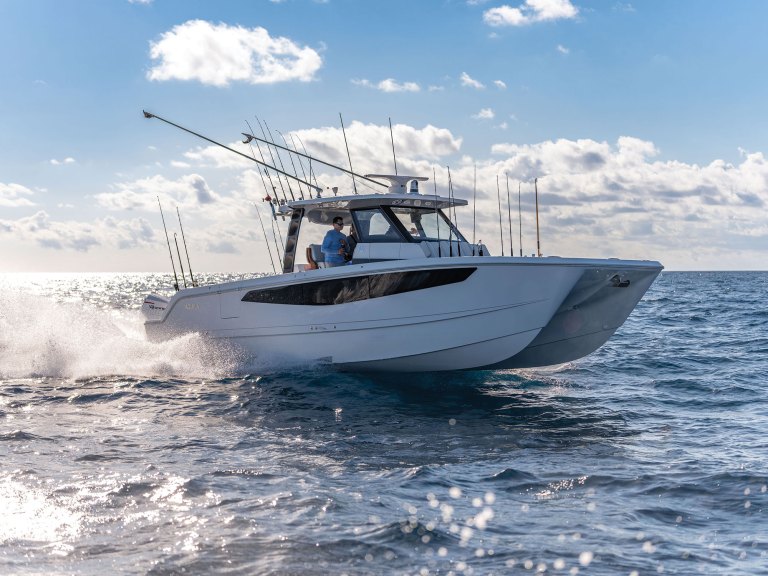
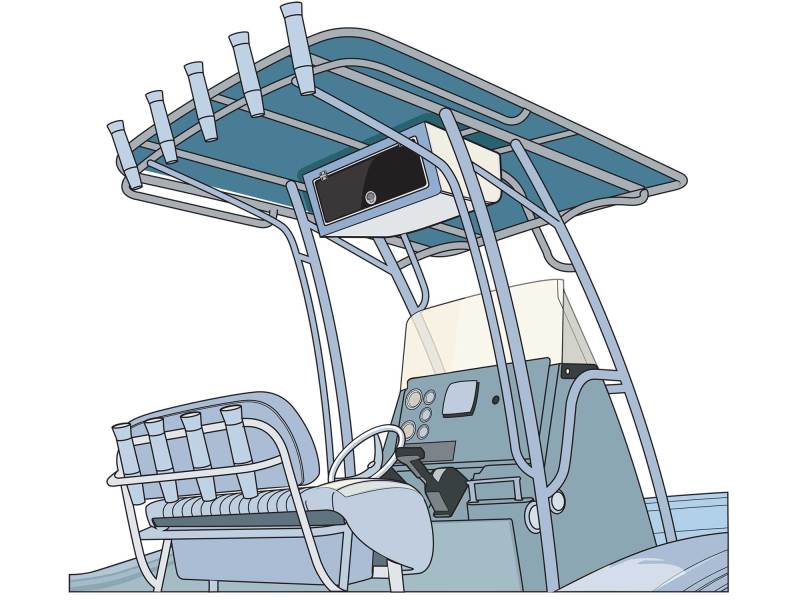
Many T-tops and hardtops offer room for installing a box on the underside, above and just forward of the helm. Known as an overhead electronics box, it is a convenient place to install a VHF radio, a second MFD or other marine electronics elements. You can also use the box to stash small items such as tubes of sunscreen, sunglasses or hats. A latching door on most boxes keeps loose items from blowing out while your boat is underway.
The exact size of the box will depend on how much room is available directly underneath the boat’s T-top or hardtop. The manner in which the boxes are mounted vary, but many canvas T-tops come with special plates on the underside of the frame for just this purpose. With some fiberglass hardtops, you can mount a box directly to the top itself.
Aftermarket off-the-shelf boxes are available from a variety of brands, including Fishmaster, Krypt, Stryker, Taylor Made, and others. If none of the off-the-shelf models fit your T-top, you can order a custom made-to-fit box from companies such as Boat Outfitters, as was the case with this project, in which the box was mounted to a pair of existing plates that were welded into the top’s aluminum frame.
Skill Level: 2 of 5
Finish Time: Approx. 4 hours
Tools and Supplies
- Custom electronics box ($600 to $1,200 depending on size and features; boatoutfitters.com)
- UV-stabilized (furniture-grade) 1.25-inch PVC pipe
- Tape measure
- Power drill and drill-bit set
- Automatic center punch for centering drill bits
- Open-end/box wrench set
- Socket wrench set and ratchet
- Phillips screwdriver
- Mitre box/saw
- Sanding wheel
- 1/4-inch stainless-steel bolts, nylon-locking nuts and fender washers
- A good buddy to help you hold the box in place while marking the mounting holes and securing the hardware
Read Next: Making New Electronics Fit In Old Cutouts
Measure to Fit
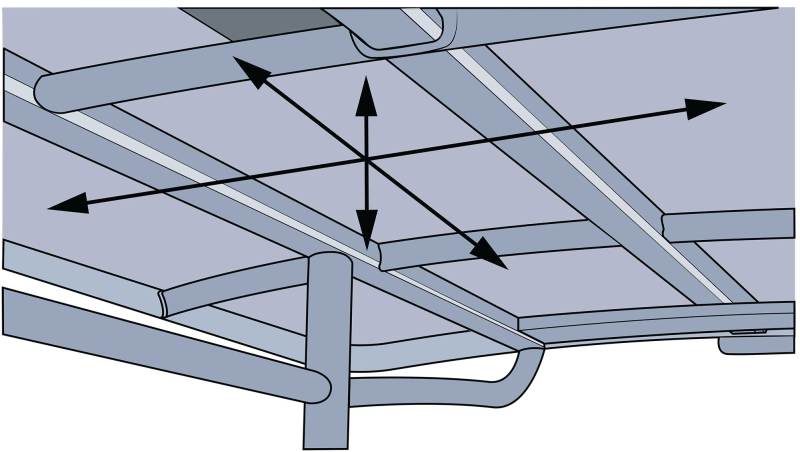
Measure the amount of space available under the top for an overhead electronics box, taking into account not only the width and depth of the box, but also the height. The last dimension is important because you don’t want the box blocking your forward view while standing at the helm. Also, ensure that you can install the box far enough forward with enough clearance so that you won’t bang your head on it. In addition, check that the upward-swing of the door has plenty of clearance to open completely.
Mounting Plan
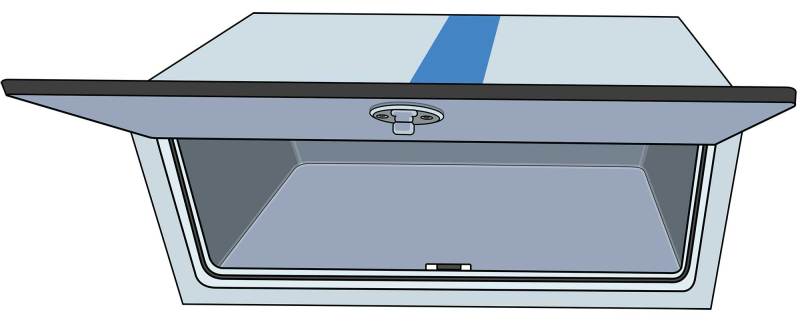
Some boxes come with mounting provisions such as rail clamps and other methods, but many boxes, such as this custom box from Boat Outfitters, do not. A DIY boater needs to adapt the installation to the T-top’s available mounting points. In this case, a pair of existing aluminum plates on the center underside of the T-top provided a mounting surface for bolting up the box. For lateral stabilization, adding two mounting points from the sides of the box to the uprights for the T-top will help minimize wobble.
Tip: The box should have a means of holding the door open to see and use your electronics inside. While many use gas-assist struts, some now feature friction hinges for this purpose.
Create a Template
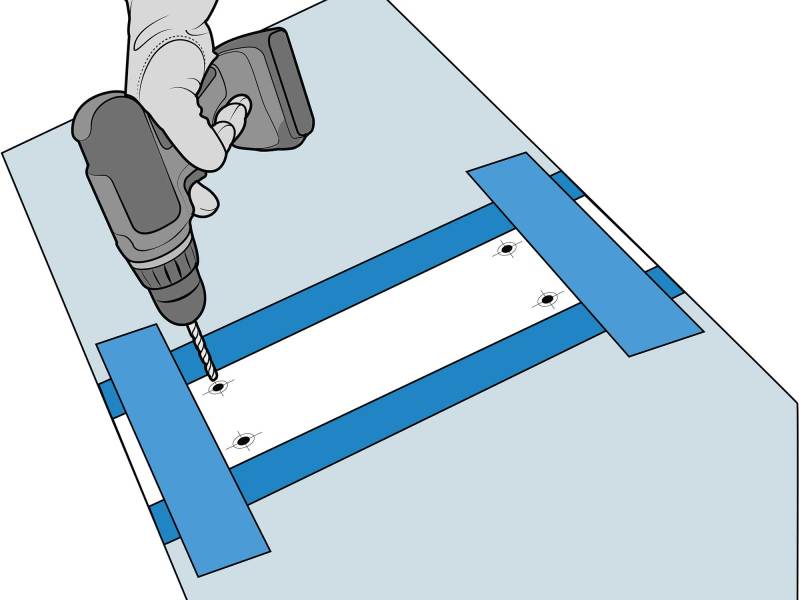
Create a template that corresponds to the top’s two mounting plates and indicates where you want to drill the mounting holes. Then transfer that template to the top-center of the box and mark each of the mounting holes, in this case two mounting holes in each of the two plates for 1/4-inch stainless-steel hardware, for a total of four. Before drilling, hold the box in the position you plan to mount it to ensure a good fit. Then bring the box back and drill the mounting holes in the top of the box.
Tip: Consider how you plan to deliver electrical power and cables to the box. For 12-volt DC power, both a positive fuse panel and a ground bus bar inside the box prove convenient. Run wires and cables ahead of time and determine where and how you plan bring them inside the box. You might need to use cable clam to create a waterproof pass-through for these.
Drill and Install
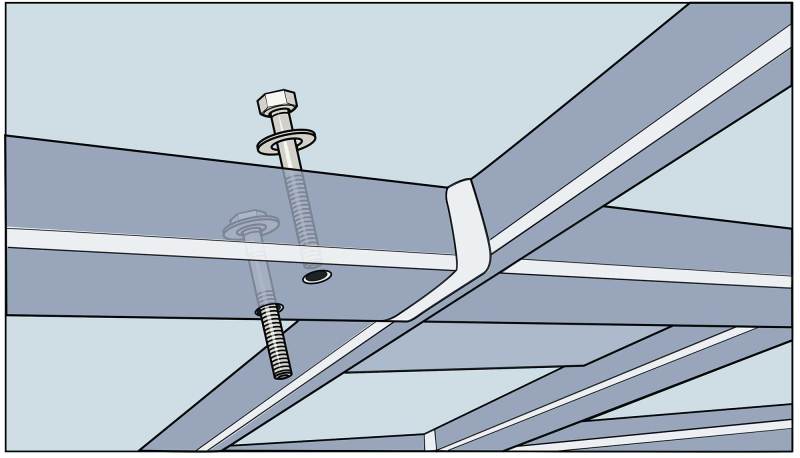
Place the box back in the desired position and, with help of a buddy, use the box itself as a template to mark the holes in the T-top’s aluminum mounting plates. Remove the box and drill the holes in the plates, being careful not to drill into the canvas top above the plates. Using four 2.5-inch-long, 1/4-inch stainless-steel hex-head bolts, nylon-locking nuts and fender washers on both ends, bolt the top into position. You might need to loosen the canvas top to drop the bolts into the holes in the plates from above.
Tip: The bottom of the electronics box is a great place to mount a dome light, if you do not already have one. Installing a dome light is easier to handle before you mount the box.
Side Braces
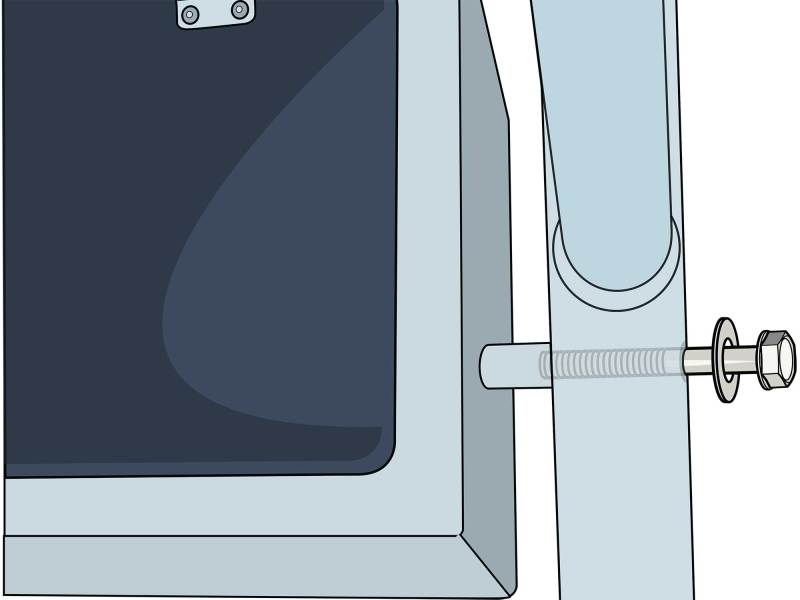
To stabilize the box, cut a pair of 1.25-inch OD UV-stabilized (furniture-grade) PVC pipe pieces to span between the sides of the box and an adjacent T-top upright. Contour one end of each pipe piece with a sanding wheel to match the contour of the upright. Drill 1/4-inch holes in the upright at the vertical mid-point of the box, then drill corresponding holes in the sides of the box. Insert 1/4-inch bolts through the uprights, PVC pipes and sides of the box and secure with nylon-locking nuts and washers on each end.